Every custom AI hardware project starts with the same structural problem: the people who understand AI do not understand manufacturing, and the people who understand manufacturing do not understand AI. The algorithm team can build a working prototype on a Raspberry Pi with exposed wires and a 3D-printed shell, but they cannot get it to pass FCC certification or survive a 1,000-unit production run. The factory can injection-mold a perfect shell and assemble thousand of identical PCBs, but they have never integrated a large language model into a device that ships to consumers. Somewhere between these two worlds, most AI hardware projects either stall or compromise on the thing that made them worth building in the first place.
Yosiya’s approach to this problem is a five-stage process designed to bridge the two worlds — AI on one side, manufacturing on the other — within a single integration partner. This article explains each stage, what happens at the gates between them, and what a hardware team needs to prepare before entering the process.
The Core Challenge: Why Disjointed Outsourcing Fails
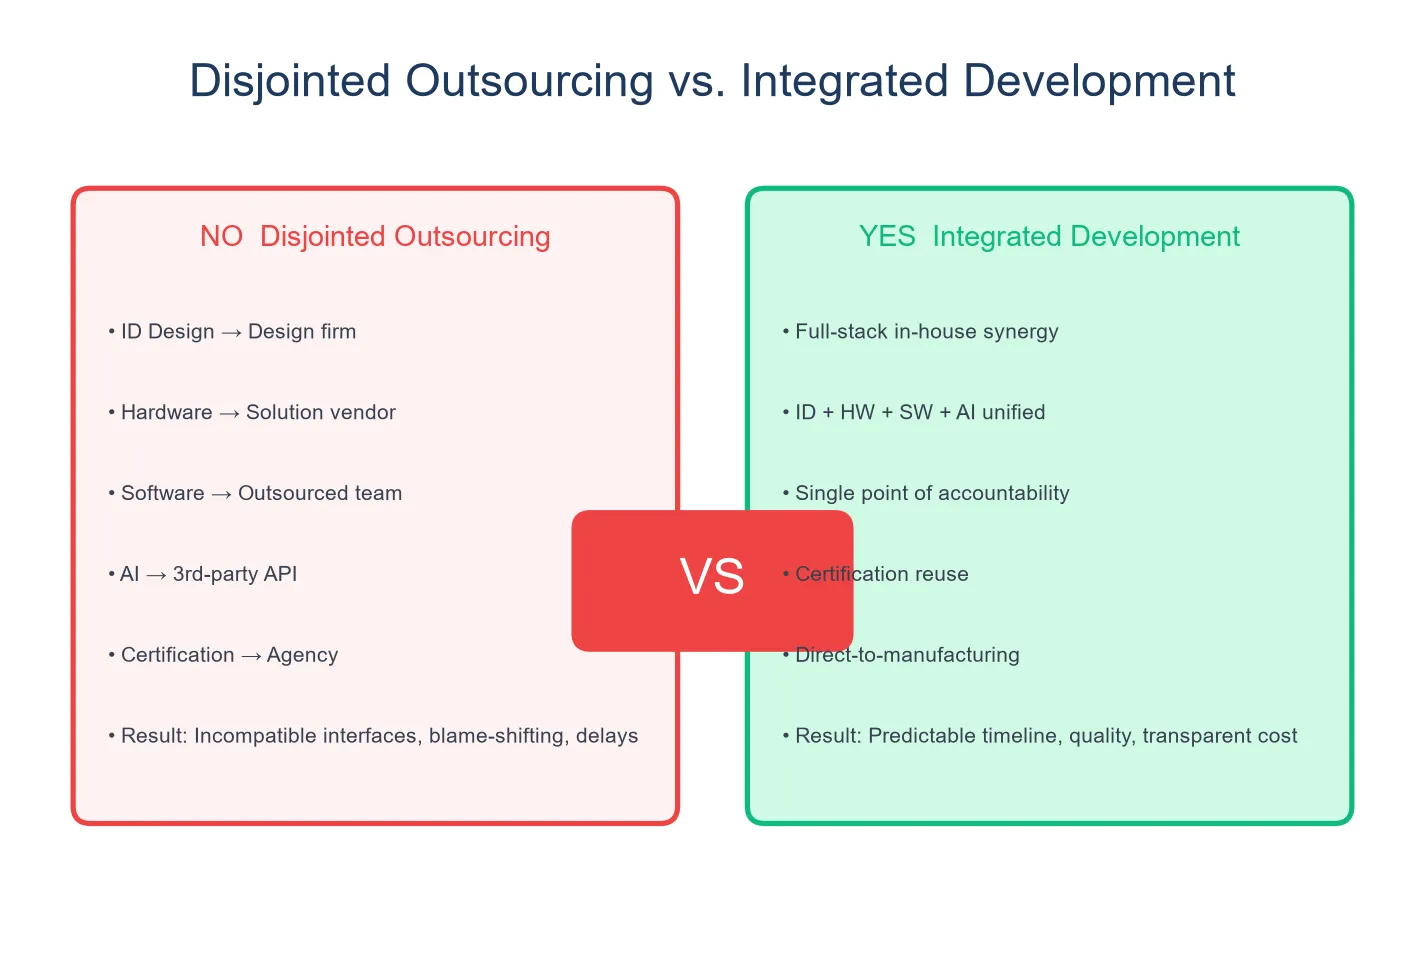
Many AI hardware projects follow a path that looks reasonable on a Gantt chart and falls apart in practice:
- Hire an industrial design firm for the enclosure.
- Hire an electronics engineering firm for the PCB.
- Hire an AI/software team for the conversation stack.
- Find a factory to assemble all three outputs.
- Discover that none of the three teams’ outputs fit together — the microphone placement causes case resonance, the AI latency exceeds the UX spec, the factory’s assembly process requires design changes that the ID firm was not contracted to make.
The failure mode is not incompetence. It is that each team optimizes for its own deliverable without a single entity responsible for the integration. A stack of best-in-class components that do not work together is not a product — it is three failed projects sharing a shipping container.
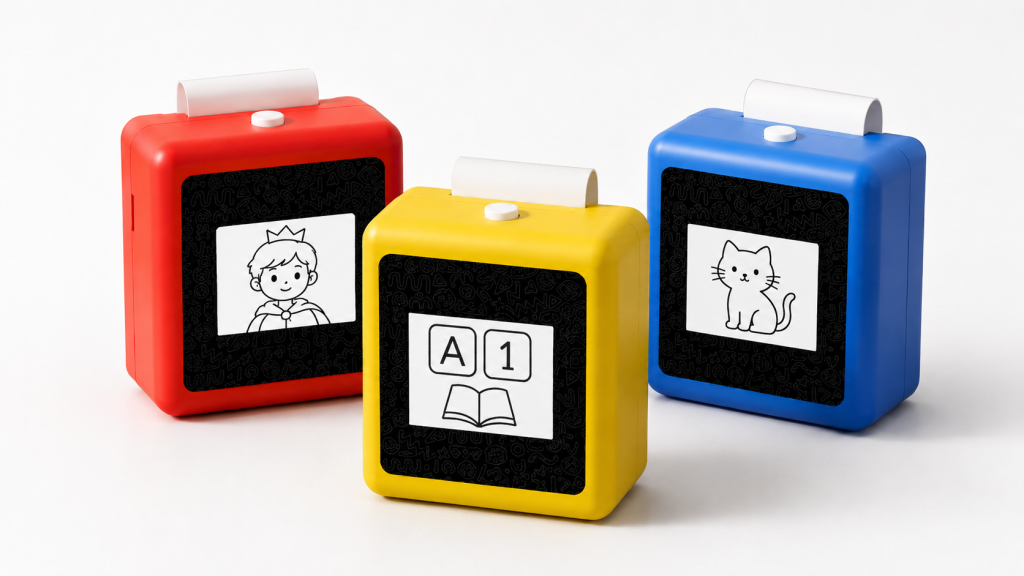
The alternative is to work with a single partner that controls — or at minimum coordinates — the industrial design, electronics engineering, AI integration, certification, and manufacturing under one project management structure. This is the model the K1 reference platform is built on, and the five-stage process reflects it.
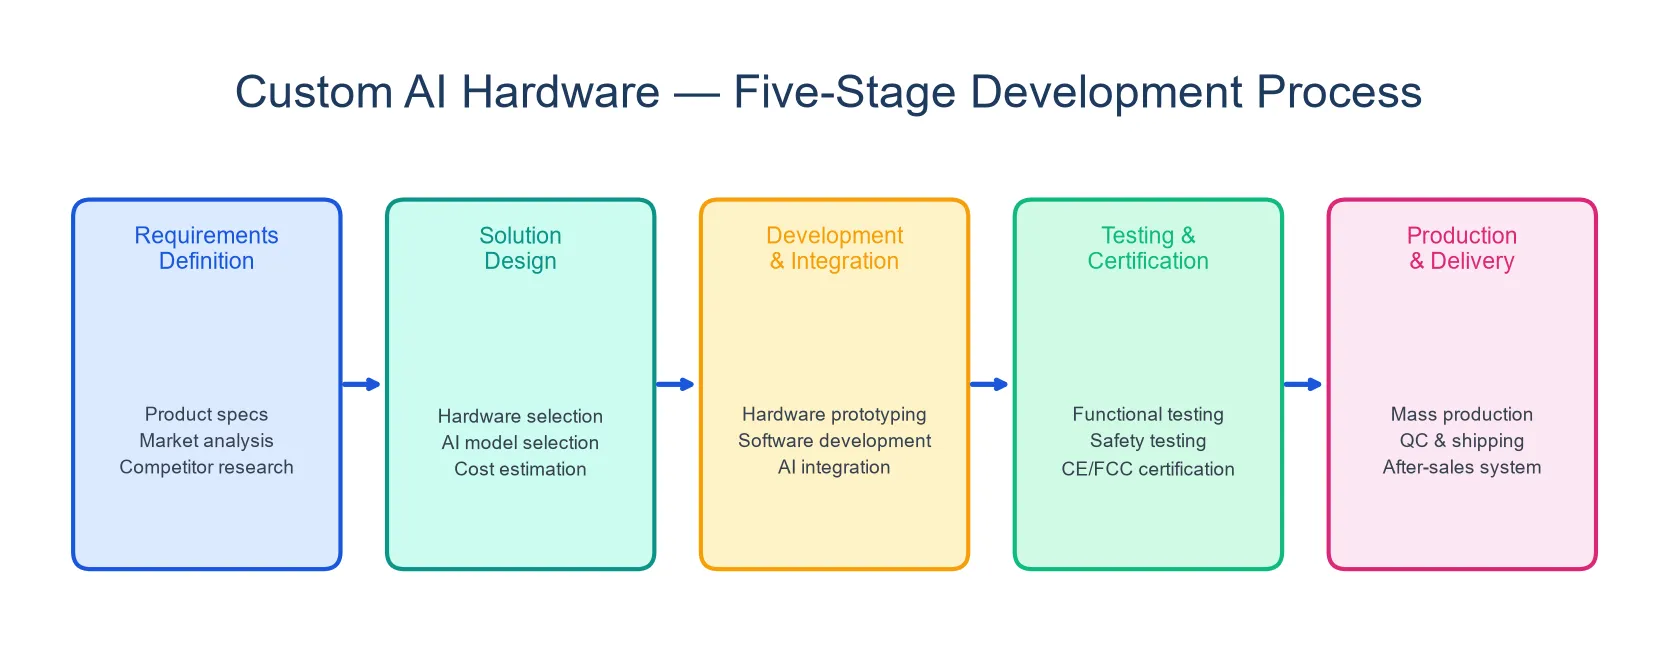
Stage 1: Consultation and Requirements Definition
Before any engineering begins, the project scope must be defined in writing. This stage produces a Project Specification Document that both parties sign.
What gets defined:
- Product concept and target use case
- AI behavior scope: what kind of conversation, what language(s), what content boundaries, what level of personality configurability
- Industrial design direction: form factor, materials, color palette, branding requirements
- Target markets and certification requirements (FCC for US, CE+RoHS for EU, additional regional certs)
- Volume projections and target unit economics
- Timeline expectations and key milestone dates
What the client should prepare before entering this stage:
- A clear description of the target user and use case — “a creative tool for children aged 5-8 that uses voice input and print output” is actionable; “an AI device” is not.
- Any existing brand guidelines, design references, or technical requirements.
- A realistic volume projection. The K1 platform’s MOQ is 1,000 units. Smaller runs may be possible but affect unit economics.
- A decision on whether the project is a customization of the K1 reference platform or a ground-up development. Customization of the reference platform moves faster. Ground-up development extends the timeline.
The consultation stage typically runs 1-3 weeks, depending on requirement clarity.
Stage 2: Architecture and Engineering
With requirements locked, the engineering phase translates the specification into hardware and software architecture.
Hardware engineering:
- PCB design and component selection
- Enclosure engineering (mechanical design, thermal management, structural integrity)
- Sensor placement (microphone, speaker, display)
- Battery and power management design
- Print mechanism integration (for print-capable devices)
Software and AI architecture:
- AI model selection and integration architecture
- Conversation management system design
- Content filtering and safety boundary implementation
- Cloud service architecture (speech recognition, language processing, image generation)
- Over-the-air update mechanism design
- API design for configurable AI parameters (personality, language, subject focus)
The integration challenge at this stage: The microphone needs to pick up a child’s voice clearly while the thermal printer — a mechanical component that generates noise — operates nearby. The AI response latency needs to feel conversational (under 2 seconds) while going through cloud processing. The battery needs to support a full session of conversation-plus-printing without making the device too heavy for a child. These cross-disciplinary constraints cannot be resolved by separate teams working in isolation — they require a single engineering lead with visibility across all subsystems.
The K1 platform’s reference implementation solves these integration problems for the standard specification. Custom projects that modify the core hardware or AI configuration may require additional engineering cycles.
Stage 3: Prototyping and EVT (Engineering Validation Test)
With the architecture defined, functional prototypes are built and tested against the specification.
What happens:
- Functional prototypes are produced — these are hand-assembled units that match the intended production design in function if not in finish.
- The prototypes undergo EVT: every subsystem is tested against its specification. Does the microphone pick up a child’s voice at arm’s length? Does the AI respond within the latency target? Does the print mechanism produce consistent output across 100 consecutive prints? Does the battery last the specified duration under load?
- Issues identified in EVT are documented, prioritized, and resolved. Critical issues must be closed before the project moves to Stage 4. Non-critical issues may be deferred with a written plan for resolution during DVT.
Common EVT findings for AI hardware:
- Microphone placement picks up mechanical noise from the print head — requires acoustic isolation or relocated mic.
- AI response time varies by network conditions — requires local caching or fallback responses for offline scenarios.
- Thermal print quality degrades as battery voltage drops — requires power management optimization.
- Physical buttons are difficult for children under five to press — requires force adjustment.
The EVT phase is where the gap between “works on the bench” and “works in a child’s hands” gets closed. It typically takes 4-8 weeks, longer for ground-up designs.
Stage 4: Tooling and DVT (Design Validation Test)
Once EVT is complete and the design is frozen, injection molds are cut and pre-production units are manufactured from production tooling. This is the largest capital investment in the process and the point of no return for industrial design decisions.
What happens:
- Injection molds are designed and manufactured for all plastic components.
- Pre-production units are assembled from production tooling.
- DVT validates that production units match the approved EVT prototypes in form, fit, and function.
- Production line processes are defined and tested.
Certification at this stage:
- DVT units are submitted for required certifications — FCC, CE, RoHS, CPC (for children’s products).
- Certification testing can take 4-8 weeks depending on the market and the testing lab’s schedule.
- If certification identifies issues, design changes may be required, potentially affecting tooling. This is why certification planning should begin during Stage 2 — catching a compliance issue after molds are cut is expensive.
The tooling and DVT phase typically runs 8-12 weeks. Custom colors, textures, or materials add time.
Stage 5: Mass Production and QA
With DVT complete and certifications obtained, production ramps.
What happens:
- Production line setup and operator training.
- First article inspection: the first units off the production line are inspected in detail against the approved DVT reference.
- Pilot production run: a small batch (typically 100-200 units) is produced and subjected to full QA.
- Ramp to full production volume.
- Ongoing QA: batch sampling, functional testing, cosmetic inspection.
- Packaging and logistics.
QA for AI hardware adds complexity: a traditional electronics QA process checks that the hardware functions — the screen turns on, the buttons respond, the printer prints. An AI hardware QA process must also verify that the AI functions — the device connects to cloud services, processes speech correctly, generates appropriate responses, and respects content boundaries. This dual-layer QA (hardware function + AI behavior) requires test protocols that most traditional electronics factories do not have in place. An integration partner’s ability to define and execute these protocols is a key differentiator.
What to Prepare Before Entering the Process
Hardware teams that enter a custom AI hardware engagement with these items prepared move faster and encounter fewer surprises:
- A product requirements document (PRD) covering target user, use cases, must-have features, and nice-to-have features.
- A competitive landscape analysis — what products exist in the target category, what they do well, what gaps they leave.
- A realistic budget covering tooling, certification, production, and contingency (15-20% is standard for first-time hardware projects).
- A go-to-market timeline working backward from a target launch date, with buffer for certification and logistics delays.
- A decision on platform vs. ground-up. Customizing the K1 reference platform is faster and lower-risk. Ground-up development offers more differentiation but at higher cost and longer timeline.
Evaluating an AI Hardware Partner
When comparing potential integration partners, assess them on these dimensions:
AI integration depth. Does the partner have an existing AI stack, or will they be integrating third-party AI services for the first time on your project? An existing stack with configurable parameters is lower-risk than a from-scratch integration.
Cross-disciplinary project management. Does a single project lead have authority across industrial design, electronics, AI software, and manufacturing? Or does each discipline report to a different department with competing priorities?
Certification track record. Has the partner shipped certified AI hardware into your target markets before? Certification is a process that gets faster with experience. A first-time certifier will take longer and cost more.
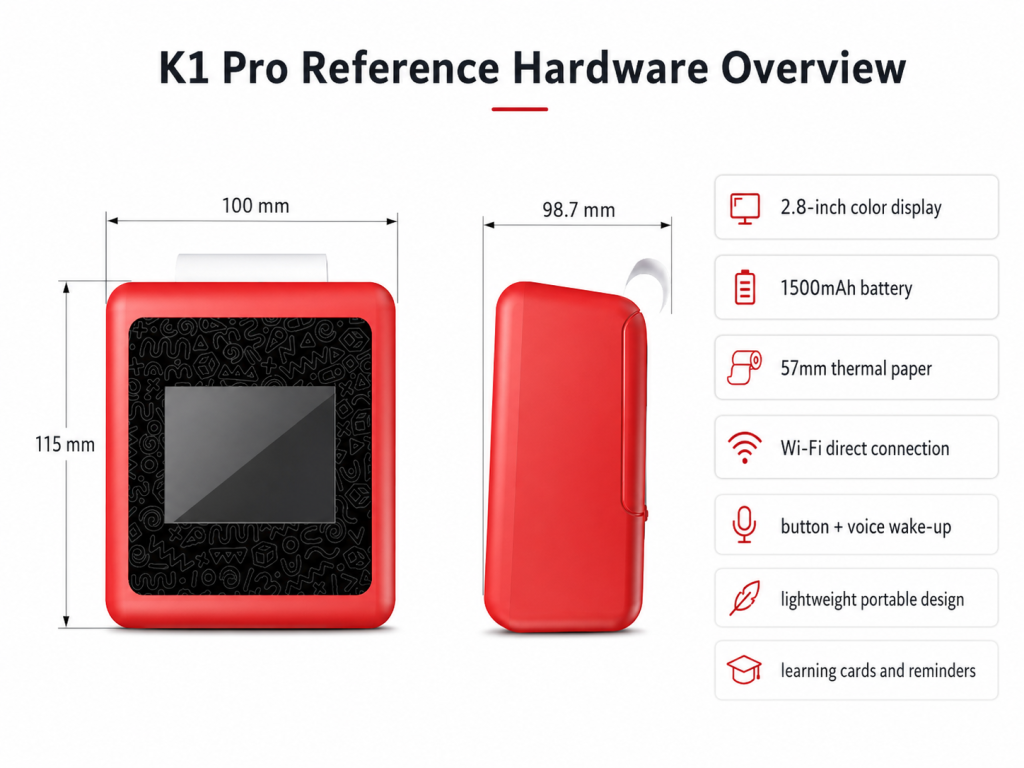
The K1 reference platform is designed as a demonstration of this five-stage model:
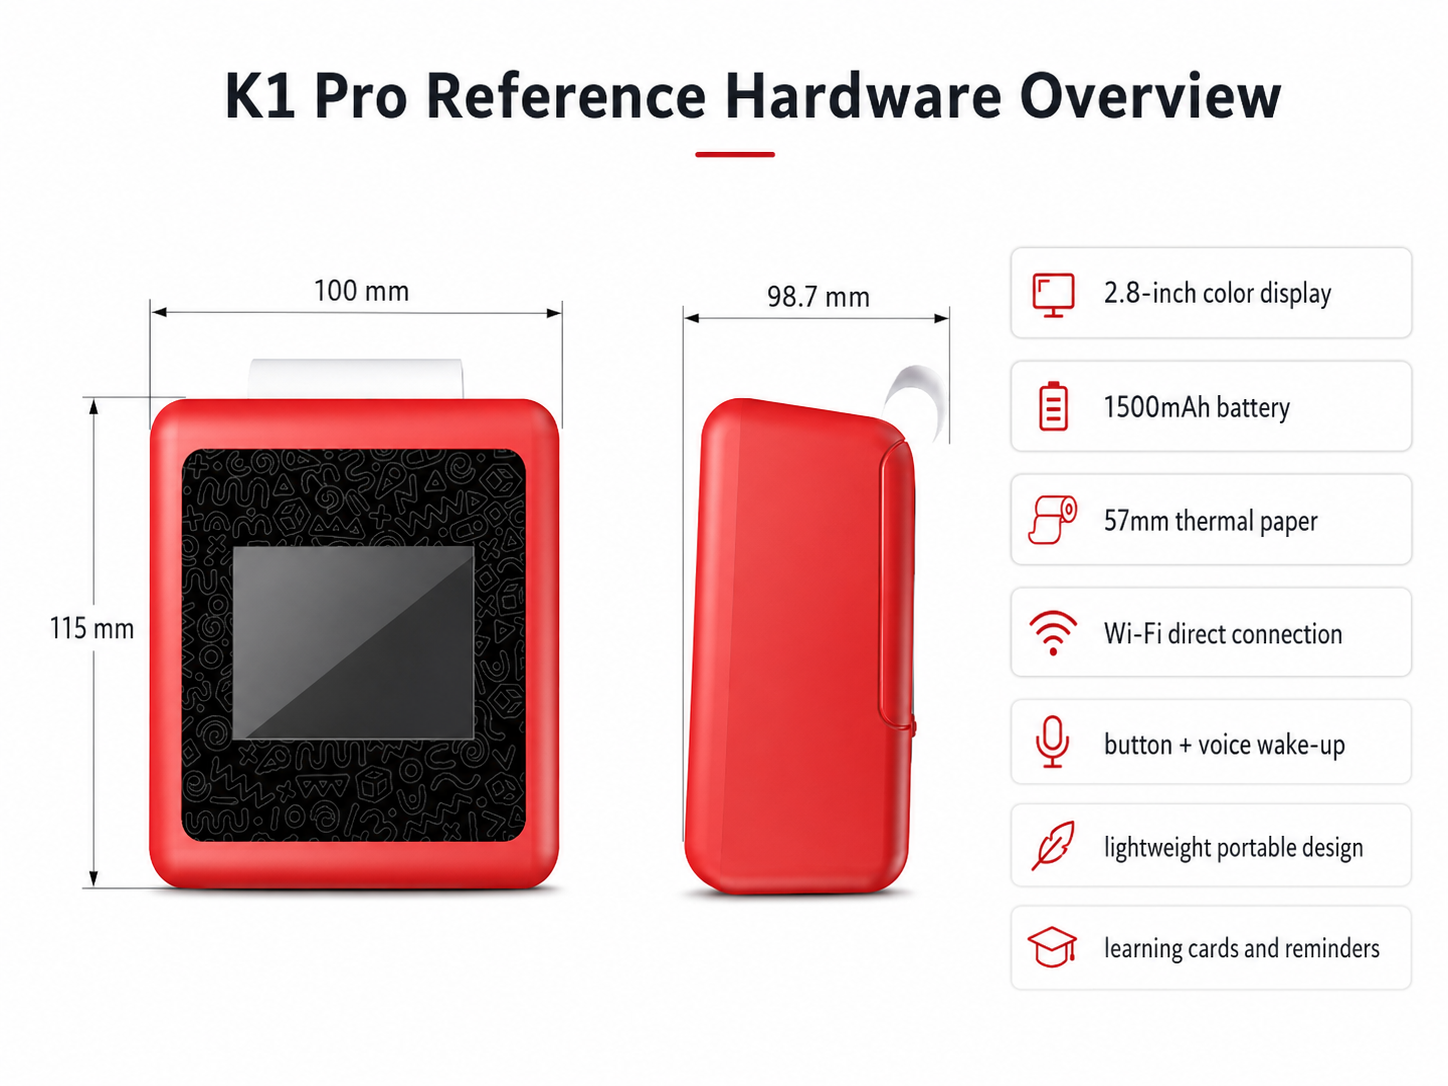
a production-ready AI hardware design that can be customized for brand, market, and use case, with defined customization parameters, established certification pathways, and a manufacturing process that has been validated at scale. The platform is not a universal solution for every AI hardware project — but for brands entering the AI toy or AI creative tool category, it removes the hardest problems (AI integration, hardware engineering, certification, and manufacturing) and lets the brand focus on what makes it different.
Book a technical consultation for your custom AI hardware project